4.2 Camera Connection
1. The RVC camera cannot be detected in the Linux system.
① Check if the firewall is enabled. If it is, please disable the firewall.
② Check whether the camera’s power supply and network cable are properly connected and secured.
③ Check if the computer is configured with a static IP. If not, a static IP must be set.
Taking Ubuntu 22.04 as an example, the steps are as follows:
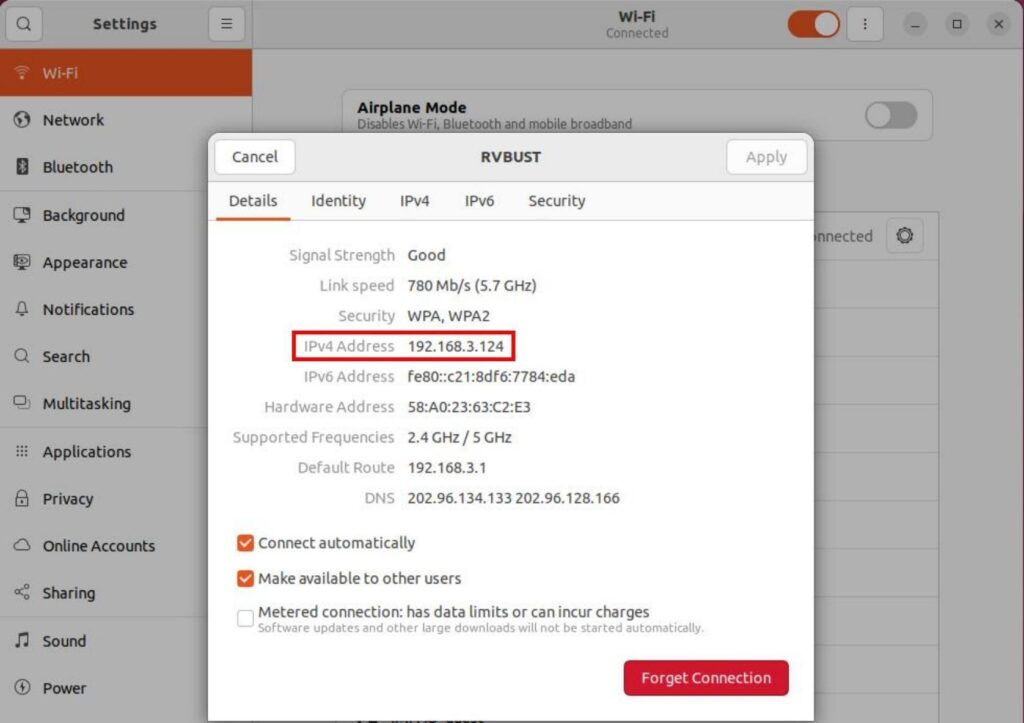
Step 1: In the system settings, find the network option (Wi-Fi or Network) and determine the current network IP address used by the computer.
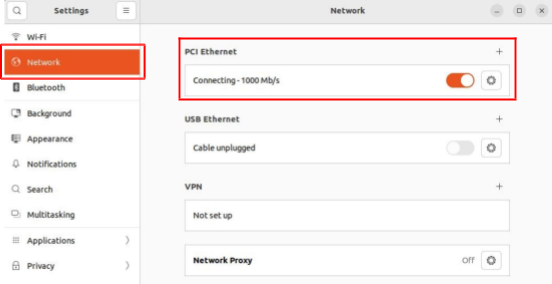
Step 2: Enter the “Network” settings. By plugging and unplugging the network cable, identify the corresponding network port to which the camera is connected.
Step 3: Open the corresponding network interface connected to the camera, go to the IPv4 tab, and change the “IPv4 Method” to “Manual”. In the “Address” section, manually enter an IP address (it must be in the same subnet as the computer’s IP address and not conflict with other devices) and the subnet mask (255.255.255.0), then click [Apply] to save the settings.

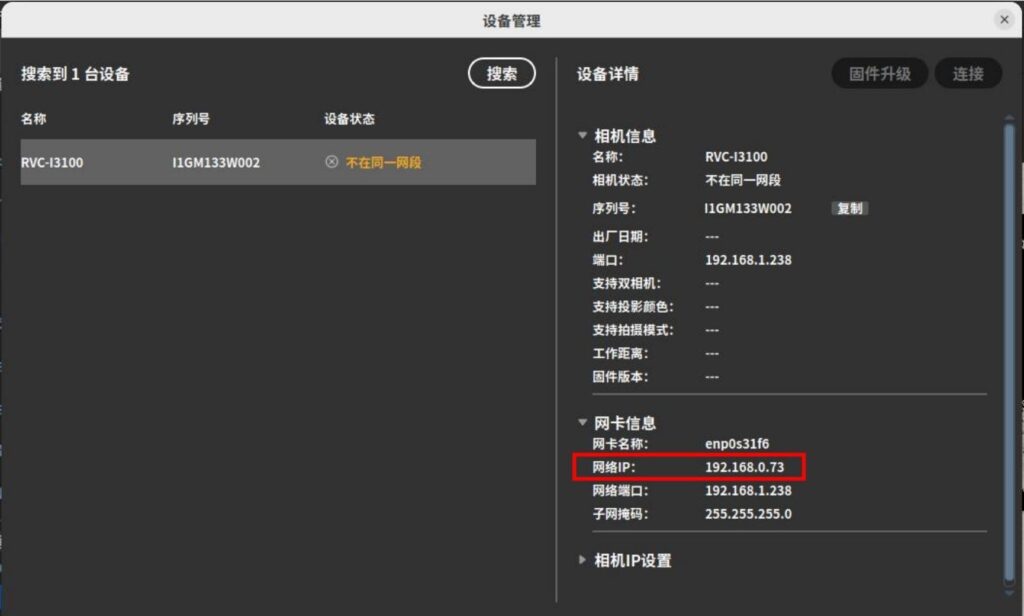
Step 4: Open the RVCManager device management pop-up window and click [Search] to refresh the device list. If the device can be found and the network IP shown in the network card information matches the manually entered IP address, it indicates that the static IP configuration was successful.
Step 5: If the device is still not detected after the above steps, you need to check whether the Linux kernel parameter rp_filter has been modified. Open the command line terminal and enter:
cat /proc/sys/net/ipv4/conf/all/rp_filterIf the returned value is 1, the parameter needs to be changed to 0. Use the cd command to navigate to the scripts folder in the RVCManager installation directory, then run the set_rp_filter.sh script:
cd /opt/RVC/scripts

chmod +x set_rp_filter.sh sudo ./ set_rp_filter.sh
If the camera still cannot be detected after the above steps, please contact technical support.
2. How to determine and resolve camera IP address conflicts?
When the camera is connected to the computer through a switch, IP conflicts may occur. An IP conflict can cause the camera to appear in the device list but fail to function (e.g., unable to open the camera). Therefore, it is recommended to check the IP before connecting the camera through a switch. See the following steps:
① First, connect the camera directly to the computer, confirm it works normally, and record the network port IP.
② Disconnect the camera, connect the computer to the network, and use the ping command to check whether any device is occupying that IP.
③ If another device is using the IP, you can either change the IP address of the conflicting device or reconnect the camera directly and modify its IP address.
3. Failed to open the camera.
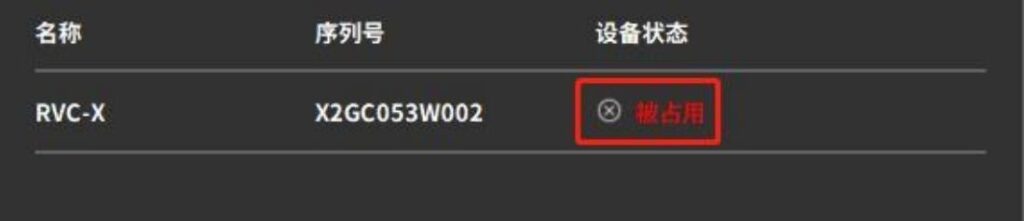
① First, open the device management pop-up window and check whether the device status is “occupied”. If the device is occupied, please release the occupation and search for the device again and connect.
② If the IP is not occupied but the camera still fails to open, check the camera connection.
USB camera: Check the signal indicator light on the back of the camera. If the light is off or flickering, it indicates a connection issue. Try using a different USB 3.0 port.
Network camera: Check the network connection, then re-search and reconnect the device.
If the issue persists after following these steps, please contact customer support.
4. When the camera is shooting, an error message “shooting timeout” appears.
Capture timeout is usually caused by a connection issue with the camera.
① Check the network cable and ensure it is securely connected.
② Verify whether the network card and router support gigabit Ethernet. If not, replace them with higher-performance network devices.
③ Avoid using USB-to-Ethernet adapters whenever possible.
④ If the network card has poor performance, refer to the network card configuration recommendations section in this document to adjust the settings.


