4 Common problems and solutions
4.1 Network Configuration
1. Are there any network requirements for using a GigE (Ethernet) camera?
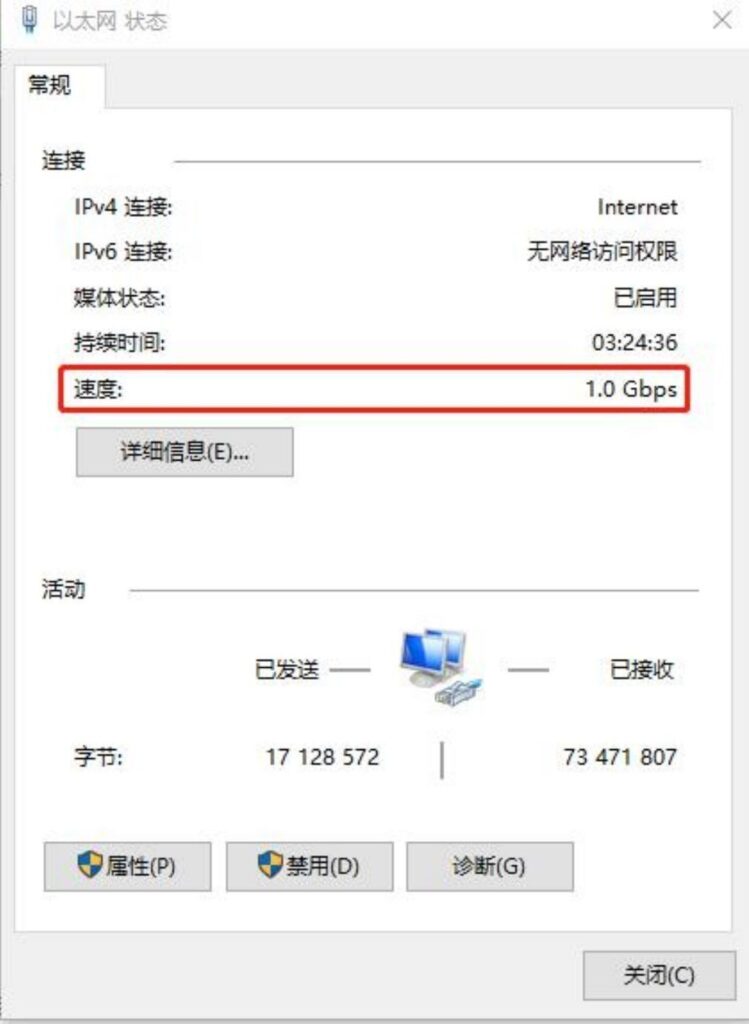
To use a GigE (Ethernet) camera, the network must be Gigabit or higher. Otherwise, insufficient bandwidth may cause issues with camera operation. As shown in the figure below, ensure the speed is greater than or equal to 1.0 Gbps.
Check path:
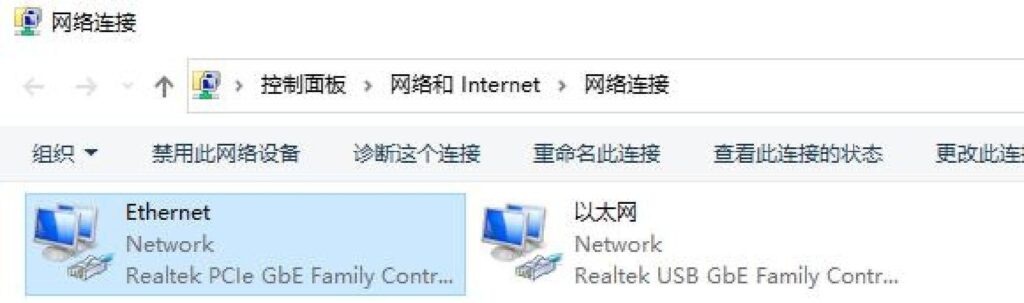
Settings → Network & Internet → Change Adapter Options
Select the active Ethernet connection, right-click and choose “Status” to view the speed.

2. If the computer has two or more network cards, how should they be configured?
Windows environment:
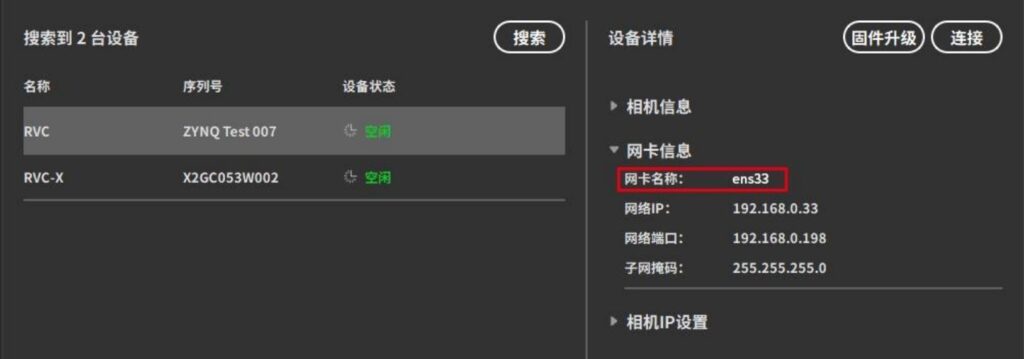
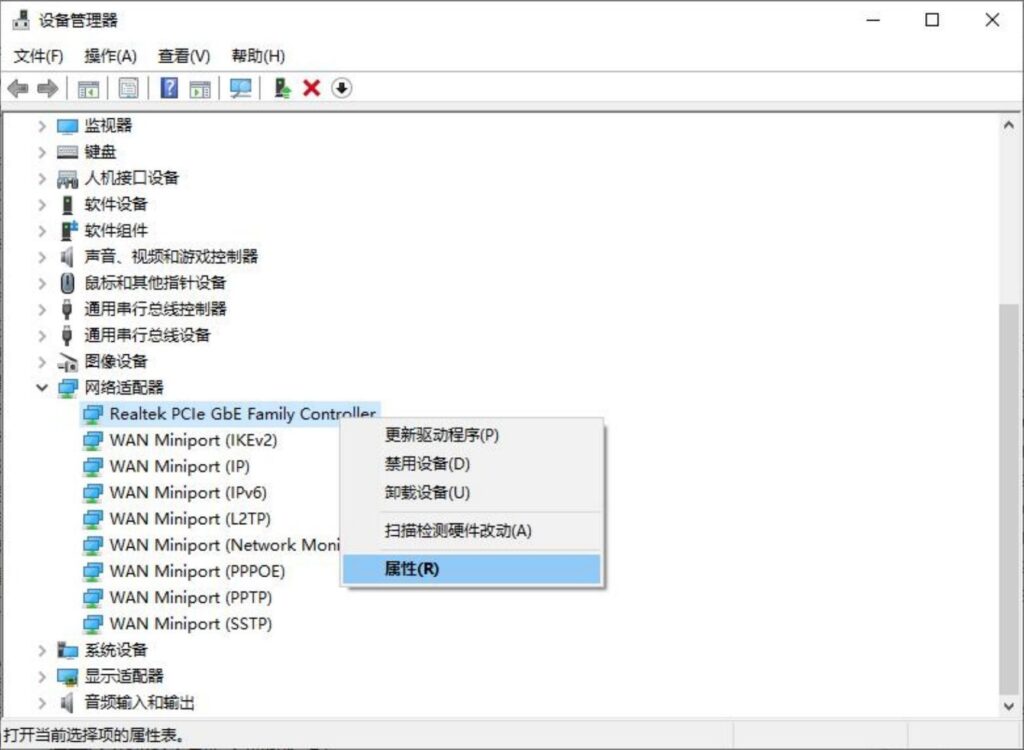
① First, check the network card information through the Device Manager pop-up window to confirm the network address corresponding to the port connected to the camera.
② If the computer has two network ports and both are on the same subnet, there is no need to confirm which port is connected to the camera. It is sufficient to ensure that they are on the same subnet.

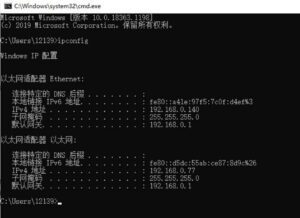
③ If the two network ports are not on the same subnet, first confirm the address of the corresponding port through the network name.

Confirm the network port to which the camera is connected by checking the camera’s connection status while plugging and unplugging the network cable.
After confirming the network port, check the network address of the corresponding port.
Use either [One-Click Configuration] or [Manual Configuration] to set the camera to a network address within the same subnet as the corresponding port.。
Note !
It is recommended not to use a wireless network card with a network port camera. Wireless network cards have unstable speeds and cannot guarantee sufficient bandwidth, which may cause issues with camera usage due to insufficient bandwidth.
Linux environment:
① First, confirm the network address of the port to which the camera is connected. Open the command terminal and enter the command ip a. The displayed result will be similar to the image below.
The box on the left shows the network interface number and corresponding name. Interfaces starting with enp or ens are physical network cards, while others are virtual network cards. The red circle indicates the current network port status: state UP means connected, and state DOWN means disconnected.
② First, check the network port status by plugging and unplugging the network cable or disabling Wi-Fi to identify the network interface name and corresponding IP address. Then, plug and unplug the network cable or disable Wi-Fi again to check the camera’s connection status and determine the network port the camera is connected to.
③ After confirming the network port, check its IP address, and then configure the camera to a network address within the same subnet as the corresponding port.
3. When using a network port camera, how to adjust the computer network card’s buffer size?
When using a network port camera, if the network is heavily occupied by other devices, the risk of packet loss increases. In this case, the computer’s network card buffer needs to be configured. The specific steps are as follows:
① Check the network card information through the Device Manager pop-up window to find the name of the network card connected to the camera.
②Install the ethtool utility. Execute the following command in the Linux terminal:
sudo apt install ethtool③Check the maximum buffer size supported by the current network card. Using the network card ens33 as an example, execute the following command:
sudo ethtool -g ens33The displayed result is as shown in the image: the maximum RX/TX buffer size supported by the current network card is 4096, while the currently used buffer size is 256.
④ Set the buffer size to the maximum. Execute the following commands in the Linux terminal:
sudo ethtool -G ens33 rx 4096 tx 4096 Note !
This method does not apply to all types of network cards. If the configuration is unsuccessful, it means that the current computer’s network card does not support this setting and needs to be replaced.
If the network card has poor performance, how can its configuration be optimized?
If the network card performance is extremely poor, causing severe packet loss with the network port camera, you can adjust the network card parameters.
Network card properties | Adjustment suggestions |
IEEE/Environmental Protection and Energy Saving | closure |
Process Control/Flow Control/FlowControl | closure |
Jumboframe | Set to Maximum |
Interrupt throttling, interrupt mode | closure |
UDP Verification (IPv4) Direct Connection Status | closure |
Intel Receive Queue | Set to Maximum |
Windows environment: Open Control Panel → Device Manager, locate the “Network adapters” option and expand it. Find the network card to be configured, right-click and select “Properties”, then open the “Advanced” tab and adjust each parameter accordingly.
Linux environment: You can use the ethtool command to modify various network card properties.


