4.3 Software installation and usage
1. After RVCManager software is installed, it crashes immediately upon opening.。
① Check whether antivirus software or the firewall has deleted any files or blocked the software.
② Verify whether the installed version of RVCManager is correct. For example, if the computer does not have a discrete GPU, but the CUDA version is installed, it may cause issues. Please install the software version that matches your system configuration.
2. What tool can be used to open the saved point cloud image?
RVCManager supports loading offline point clouds, allowing for basic processing and re-saving. You can also use common point cloud processing software to further edit the saved point clouds.
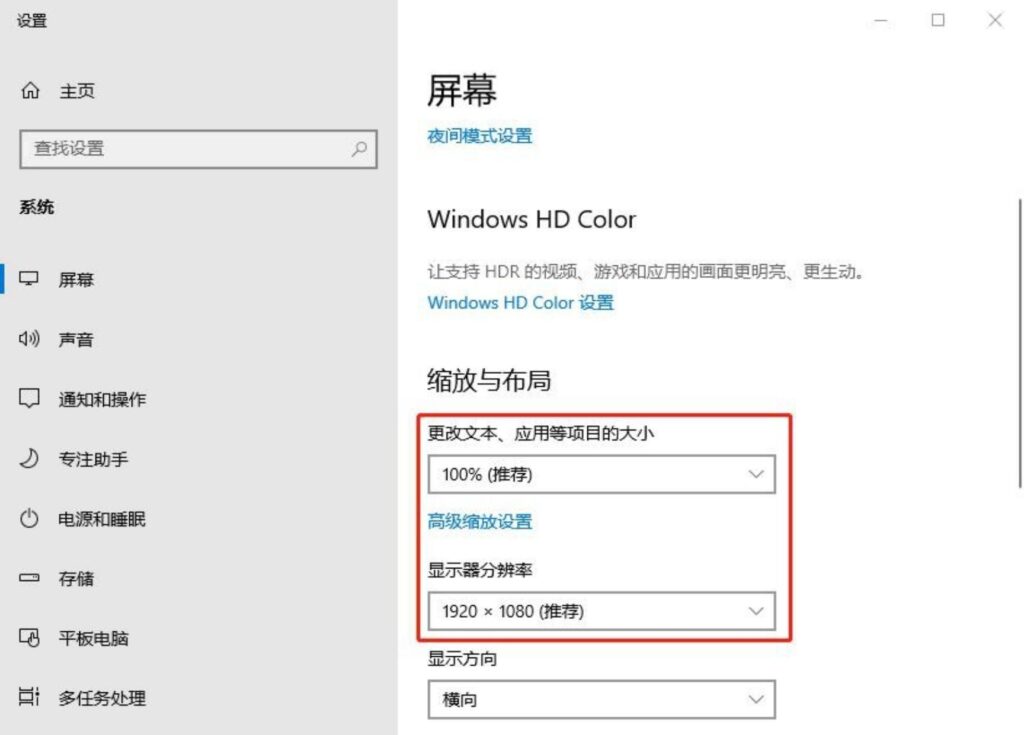
3. After opening the Windows version of RVCManager, the software interface is not fully displayed.
This problem is usually caused by the software not matching the screen resolution.
Right-click on the desktop, select Display Settings → Screen → Scaling and Layout, and set the “Display Resolution” to 1920
×1080, change “Change the size of text, apps, and other items” to 100%, and reopen the software to display it in full.
4.4 Point cloud parameter adjustment
1. What information needs to be confirmed before point cloud debugging?
Camera configuration, software version, camera calibration information, test scene and ambient light, sample type, camera layout, etc.
2. The captured 2D image is blurry.
① Check whether the protective film on the camera lens has been removed and whether the lens is dirty. Please remove the film and clean the lens.
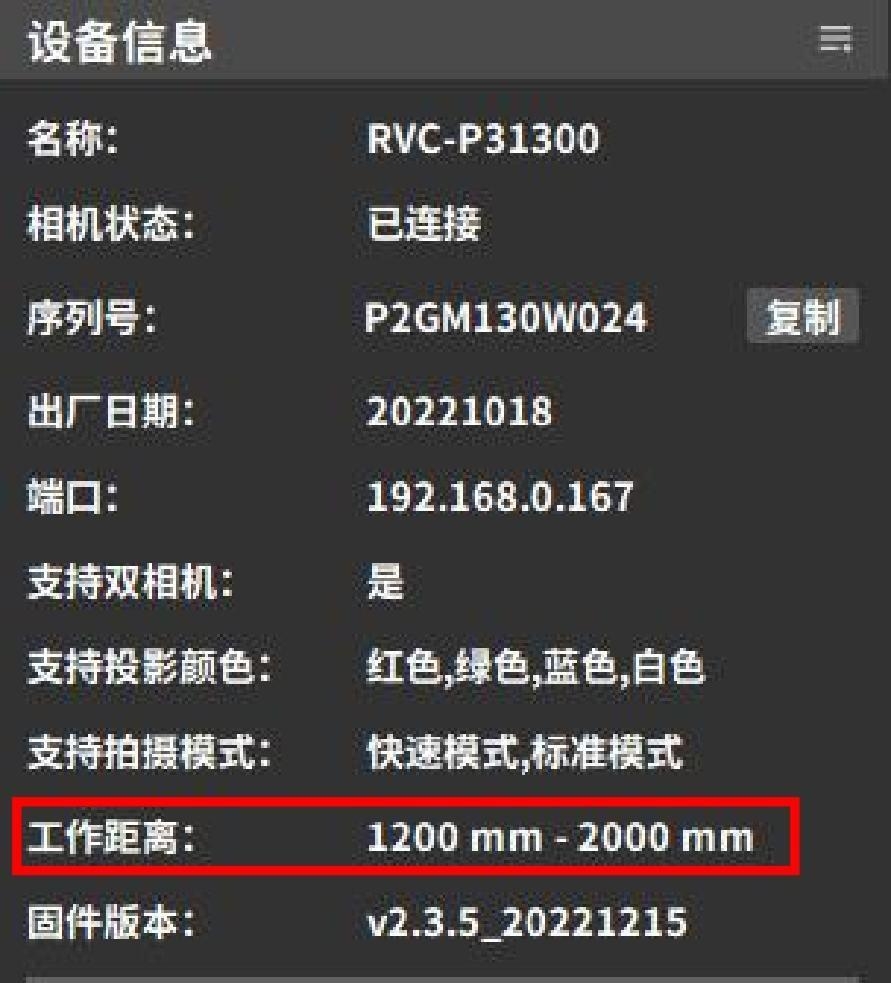
② Check whether the camera is within the appropriate working range. You can view the working distance in the device management pop-up or in the “Device Info” section on the left panel of the main interface. If the camera is not within the working range, adjust its shooting position accordingly.
③ ③ If using a binocular (stereo) camera, you can switch to the other lens to check whether the image is out of focus.
3. The captured 2D image is very dark, and the point cloud appears dim, making it difficult to distinguish features.
This issue is usually caused by insufficient 2D exposure. Increase the 2D exposure time or 2D gain, and ensure that the “2D camera uses projector” option is set to “Yes.” If the 2D image is still too dark, additional external lighting should be used for illumination.
4. The captured 2D image is too bright, the point cloud color is light, and the bright features cannot be seen clearly.
This is usually caused by 2D overexposure. You need to reduce 2D exposure or 2D gain.
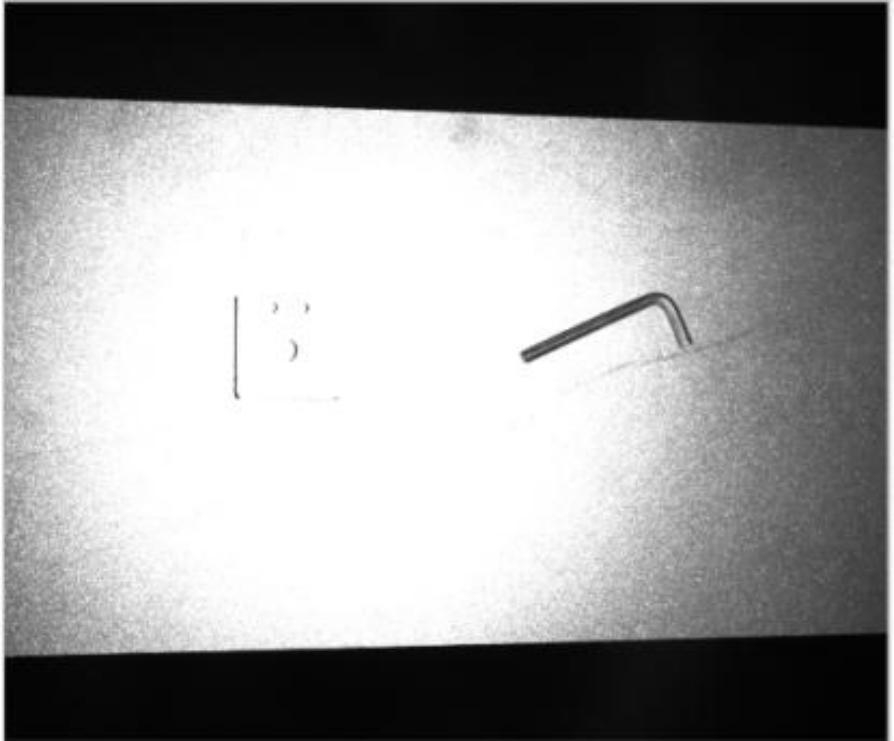
5. Light spots appear in the 2D image (as shown in the figure), affecting recognition.
① Check whether there is a light source directly shining on the subject, and adjust the position of the light source or the subject.
② It may be caused by optical projection. You can select “No” for the “2D camera uses optical projection” option and reduce the 2D exposure time, 2D gain, and projection brightness.
6. The captured point cloud shows complete data in light-colored areas, but missing data in dark-colored areas.。
This issue is usually caused by insufficient 3D exposure.
① Check whether the projection brightness is set to the maximum. If not, increase the projection brightness.
② If the projection brightness is already at its maximum, try increasing the 3D exposure time and 3D gain to improve data completeness in the dark-colored areas.
7. The dark part of the captured point cloud is complete, but the light part is missing.
This situation is usually caused by overexposure of the light-colored part of the 3D image. You can reduce the 3D exposure time, 3D gain, and projection brightness in sequence to make the light-colored part data more complete.
8. The object being captured has a highly reflective surface, resulting in point cloud loss in the reflective areas.
① Reduce the projection brightness or use HDR mode.
② If the issue persists after adjusting parameters, try changing the camera’s shooting angle or the position/orientation of the object to minimize reflections.
9.The captured object has large variations in color and material, causing incomplete point cloud data in light, dark, and reflective areas.
In this case, a single exposure cannot capture the object completely, so HDR functionality is required.
HDR mode allows setting 2 to 3 exposures, each targeting different colors and materials, and then merges the data to obtain a complete point cloud.
10. Color cameras have distorted colors.
If the color of the color camera is distorted, it can be corrected via Camera Functions → Auto White Balance. For usage, refer to the Auto White Balance example section.
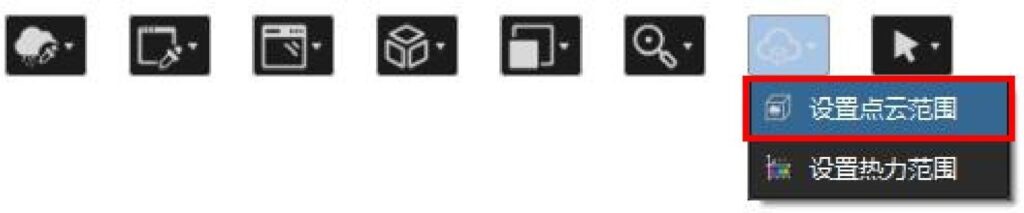
11. There are large areas of missing points in the point cloud.
① Check whether the point cloud display range is set. You can open the pop-up box in “Set point cloud range” to modify the value and adjust the point cloud display range to match the current window display content.
② Check whether the camera is within the appropriate working range. You can view the working distance in the device management pop-up or in the “Device Info” section on the left panel of the main interface. If the camera is not within the working range, adjust the shooting position accordingly.
③ Check if there is strong direct light in the environment. If so, reduce the lighting intensity.
④ Check whether the light intensity contrast threshold is set too high, or if denoising post-processing parameters are set too aggressively. Adjust the parameters and recapture the image.
12. When shooting in binocular mode, holes appear in the point cloud.
You can adjust the light intensity contrast threshold, reduce the edge denoising level, and improve the point cloud quality.
13. What to do if point cloud effect debugging is not good? What data should be collected?
① If using a binocular camera, switch to the other lens or switch to binocular mode for further debugging.
② If using a monocular camera, or switching modes on a binocular camera still does not yield good results, collect point cloud data and advanced logs, record shooting parameters, and gather photos of the environment, sample, camera setup, camera model, calibration, and testing information, then report to technical support.
③ You may contact technical support for remote assistance.


