![]() The shortcut button opens the Device Management pop-up window, where you can connect, disconnect, or switch cameras
The shortcut button opens the Device Management pop-up window, where you can connect, disconnect, or switch cameras
From the menu bar → File → Open File, or click. ![]() Click the shortcut button to view the point cloud files that have been saved on the machine. Currently, only .ply format is supported. After opening the point cloud, you can modify the point cloud display mode (pure color/pixel color/heat map/pseudo color), point cloud range/heat map range and single point size. The modified point cloud can be saved again.
Click the shortcut button to view the point cloud files that have been saved on the machine. Currently, only .ply format is supported. After opening the point cloud, you can modify the point cloud display mode (pure color/pixel color/heat map/pseudo color), point cloud range/heat map range and single point size. The modified point cloud can be saved again.
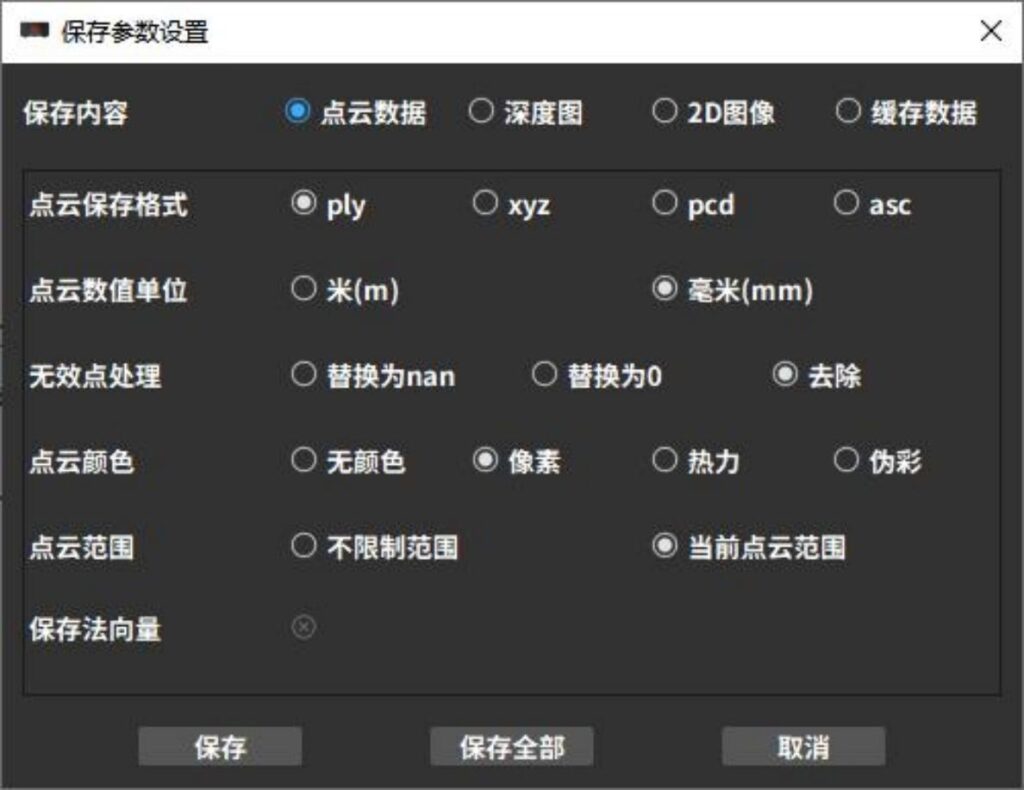
From the menu bar → File → Save file, or click ![]() Quick button to save the currently selected preview data. When saving data, you can select file types such as point cloud, depth map, 2D image, cache data, etc.
Quick button to save the currently selected preview data. When saving data, you can select file types such as point cloud, depth map, 2D image, cache data, etc.
Save Point Cloud: Allows selection of save format, measurement units, point cloud range, and invalid point handling method. You can also choose to save normal vectors, point cloud color, and other information.
Save Depth Map: Saves the captured depth map in .tif format with selectable measurement units.
Save 2D Image: Saves the captured 2D image in .png format.
Save Cached Data: To quickly compare shooting information, you can choose to retain cached data (including point cloud, shooting parameters, depth map, etc.) in the software. Cached data is not saved to the hard drive and will be lost after closing the software—please confirm the save type.
Save All: Click [Save All] to save the current point cloud, depth map, and 2D image simultaneously.